Fazal Majid's low-intensity blog

Sporadic pontification

Fazal

My guide to Panoramic Photography

TL:DR I have been shooting panoramas for over a quarter century. Here’s what I learned along the way.

Table of Contents

Cropping

Back in the bad old days of film photography, the simplest way to yield a panorama was to take a photo using a wide-angle lens, then cropping the top and bottom of the frame away. Here is a shot of the Mont Saint Michel I took circa 1995 with my old Nikon 35Ti luxury point-and-shoot, that had a panorama slider switch that would enable this cropping in-camera.
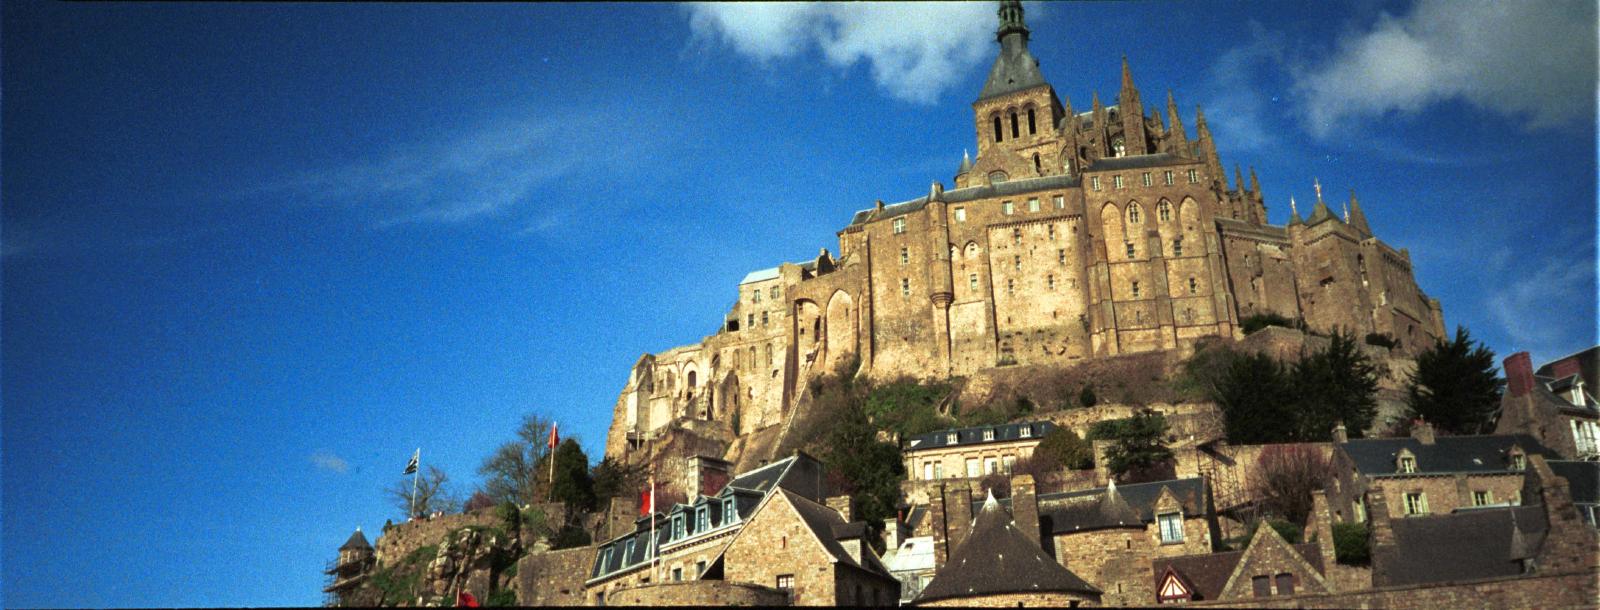
Mont Saint Michel panorama

Photo minilabs of the day could make panoramic prints with roughly 3:1 aspect ratio. Obviously you throw away some image resolution and detail in the process, and the higher enlarging magnification meant grain was more apparent.

Phone camera apps

Nowadays of course, most regular people’s exposure to panoramic photography is through their smartphone camera app, which makes you rotate the camera slowly and uses the vast computational power of their CPU to stitch it together in near real-time. The results can be pretty good if you have a steady hand.

Most proper digital cameras sold today also have this feature built-in, as long as you accept losing the ability to shoot RAW.

Stitching photos

To work around the limitations of optics, software was developed that would warp, combine and stitch together multiple exposures into a single panorama, whether one meant to be projected onto a cylinder, a sphere, or if the angle is not too wide, a flat surface. As any student of geography knows, projecting a sphere onto a flat surface inevitably entails distortion, but if it’s a partial panorama, this can often be ignored. The exposures need to have a significant amount of overlap so the software can find the overlap and calculate how the images need to be warped to fit. This is usually done using an algorithm called SIFT combined with RANSAC. SIFT was developed at the University of British Columbia in Vancouver, and used to be patented until the patent expired in 2020.

You can certainly take multiple exposures hand-held in a pinch, but for professional results, it is highly advisable to use a tripod with a panorama head designed specifically for the task.

Parallax and the nodal point

An ideal lens would have all rays converging at a point the focal distance away from the sensor. If you rotate the camera around that focal point, you would be able to cover the entire scene perfectly. Rotating the camera around any other axis would cause the relative positions of near and far objects to shift

Drag the slider to move the lens's nodal point relative to the tripod's fixed rotation axis. The left diagram shows the setup before rotating; the right shows it after a fixed 30° pan; the bottom row previews what the resulting photos look like.

90 px — behind axis
Field of view ray trace before and after rotation, with resulting preview frames Two top-down diagrams: before rotating, with the nodal point offset from the rotation axis and a 90 degree field of view framed by light gray edge rays; after rotating 30 degrees, showing the near and far object's colored rays through the shifted nodal point landing at different points on the sensor. Below, two preview frames show what the lens sees: aligned in shot 1, and the near object displaced from the far object in shot 2 after panning. An interactive slider (JavaScript required) lets the offset be adjusted live. Colors adapt to light or dark mode automatically. before rotating after rotating 30° axis (fixed) nodal point sensor field of view (90°) far object near object what the lens sees shot 1 — aligned shot 2 — after panning shift far object — its true position in the frame near object — actual vs. would-be-aligned spot

(credit: interactive widget built by Anthropic's Claude)

Thus, to calibrate the nodal point:

  • Put your camera and lens on a tripod.
  • Find some distant vertical object like a lamp-post.
  • Rotate the camera until the distant object is perfectly centered in the viewfinder
  • Put a pole or some other vertical object, aligned between the tripod and the distant object. The near object should also be in the center of the viewfinder.
  • Now rotate the camera clockwise on the tripod:
    • If the near object has shifted right of the distant object, your nodal point is behind the rotation axis. Adjust the nodal slide on your pano head forward.
    • If the near object has shifted left, the nodal point is too far ahead of the axis, and you need to adjust the slide back.
  • If you do this with a live viewfinder, you should be able to adjust the nodal slide smoothly until the two objects coincide again, without having to do many back-and-forth adjustments. Good pano heads have graduated rulers, you can make a note of the nodal slide position for the camera and lens combo.

Manual panoramic tripod heads

Kaidan Kiwi+

The first pano head I purchased was a Kaidan Kiwi+ (PDF). It was fairly crude and not that well machined compared to what you can get from Manfrotto or ReallyRIghtStuff today. One feature that distinguished it was the use of interchangeable detent discs, that allowed you to take the right number of exposures for your lens and camera combo, with more precision and less guesswork than doing it by hand using graduated scales on a regular tripod head. The head also had a horizontal adjustment to slide the camera back and forth until the nodal point of the lens was aligned with the tripod vertical axis, to avoid parallax. Most modern panorama heads follow similar design principles.

PocketPano

PocketPano is a German company that makes beautifully crafted pano heads for compact cameras. The material is interesting in that it is laminated paper imbibed with resin, with metal hardware, which makes it very light yet strong. I have one bespoke for the Ricoh GRIII, which means no fumbling around with nodal point calibration, it is precalculated and you just screw the GRIII in it.
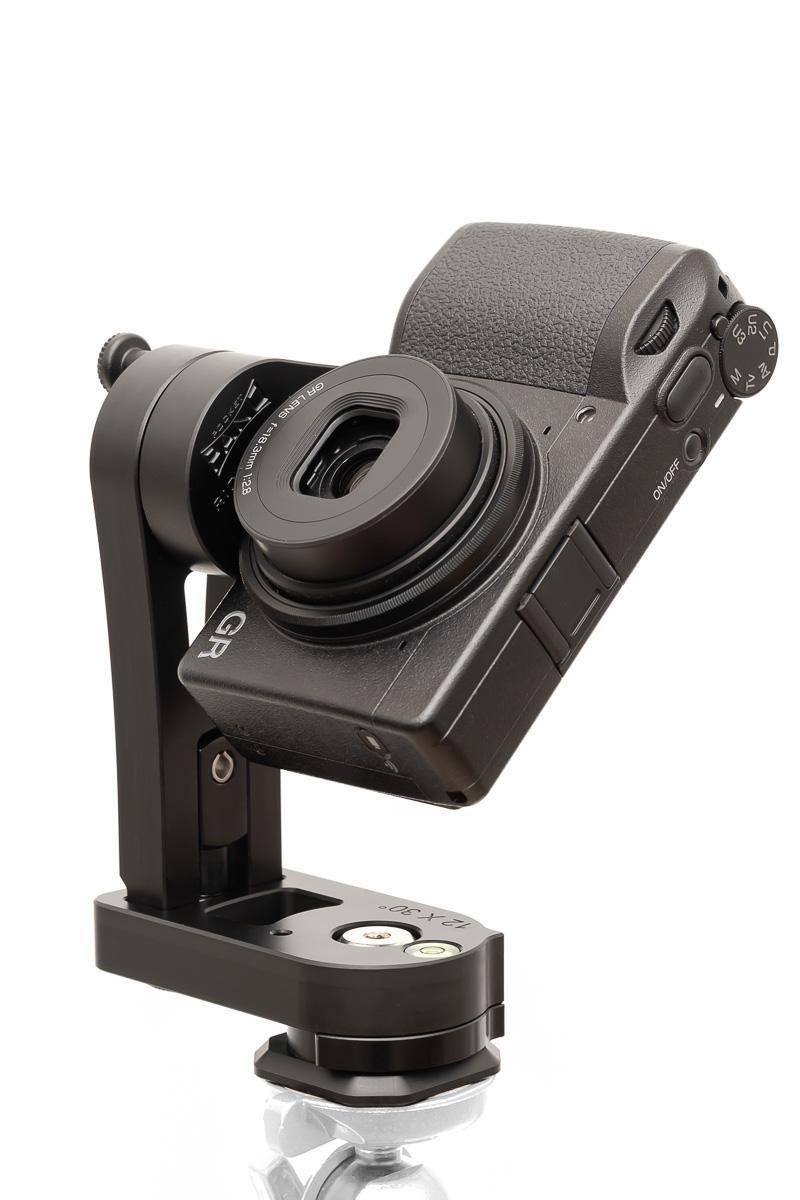
PocketPano with a GRIII

Motorized pano heads

Using a manual panorama head is incredibly tedious and error-prone, which is why I don’t recommend using one and would advise instead using a motorized head that you can program to set the number of exposures needed for your lens and camera combo, and it will take them. The tricky part is

Gigapan Epic 100.

Gigapan, an offshoot of Carnegie-Mellon University and NASA, was one of the first companies to make motorized panorama heads. They were originally designed for the Mars Spirit and Opportunity rovers, then repurposed to shoot gigapixel and higher panoramas using telephoto lenses, where ordinary panorama heads with click-stops are simply not accurate enough. I have the smaller Epic 100, which is designed for mirrorless cameras and a perfect fit for a Leica M.

Benro Polaris

This motorized head was a successful Kickstarter. As the name implies, it was first and foremost designed for astrophotography as a replacement for a German equatorial mount, but it can also be used as a motorized pano head, and is much cheaper and more compact than a Gigapan. The build quality is excellent, e.g. the use of metal gears you only get in the top-end Gigapan models, the lower ones having to content themselves with plastic.

The way the Polaris works, however, means it is impossible to get perfect alignment of the nodal point, so this limits its applicability for panoramas, for instance they would not be ideal for real estate virtual tours.

Rectilinear panoramic cameras

I have owned two rectilinear panoramic film cameras: the Hasselblad X-Pan II (made by Fuji and also known as the Fuji TX-2 in Japan) and the Fuji G617. I have never owned a Widelux or Noblex type camera that works by rotating a lens across the frame, however. Actor Jeff Bridges is attempting to reboot the Widelux.

The X-Pan and X-Pan II were outstanding cameras, with a build quality that made a Leica MP feel insubstantial. The lens aperture click stops were a thing of beauty.

The G617 (and its interchangeable-lens sibling the GX617) were large-format cameras masquerading as medium-format ones, shooting a huge 6x17cm negative or slide which corresponds to a crop of a 5x7 negative, and thus using large-format lenses, but using much more convenient 120 or 220 medium format roll film. A single roll of 120 film could only hold 4 frames… These were imposing cameras meant to be used on a tripod, but I’ve known photographers like Mark Denton who used them handheld. Mainstream production of these cameras ended two decades ago, but there are hobbyist efforts, often 3D-printed.

Scanning such wide negatives was a challenge. You could use a flatbed scanner, but their optics capable of at best 1000 ppi resolution are inadequate for the extremely high quality lenses, as I recount in my article on loupes and so I had also purchased a Nikon Super CoolScan 9000 ED medium-format film scanner and the specialized medical slide film holder that could actually hold a 6x17 frame without it drooping thanks to the anti-Newton glass in the holder.

Since professional film scanners have gone the way of the dodo, there are no real prosumer options left for scanning 6x17 film even if you buy one of the few 6x17 camera models still made, you would need to settle for a flatbed scan (and even the Epson V850 has been discontinued due to lack of availability of linear CCD sensors) or find one of the dwindling number of service bureaus that still have drum scanners.

360° cameras

Ricoh revolutionized the field when they launched the Theta in 2013. I’ve owned nearly every model in that line they released since, up to the first-generation Theta Z1. I also have a DJI Osmo 360 with a similar design. The Z1 has two large (for 360° cameras) 1" sensors, that yield excellent image quality despite Ricoh’s conservative resolution settings, unlike their Chinese competitors’, ahem exuberant megapixel specs like the Osmo 360’s alleged 120MP that are simply not supported by reality.

These cameras operate by having two 180° fisheye lenses on either side of the camera, each with its own sensor, taking in half of the total field of view. Software inside the camera stitches the two halves into a single 360° panorama. Since both lenses shoot a single frame, there is no risk of ghosts.

Insta360 makes a number of well-regarded 360° cameras (I have never owned one, however). They went one step up with the Antigravity A1 quadcopter that has a built-in 360° camera instead of the usual gimbal-mounted wide-angle.

Tripods and Selfie sticks
Mont Saint Michel panorama

When shooting with a 360° camera, it is very important to use either a selfie stick or a tripod designed to stay within the blind spots of the fisheyes so it does not appear in the final result. Holding the camera with your hands guarantees they will feature prominently and spoil the photo.

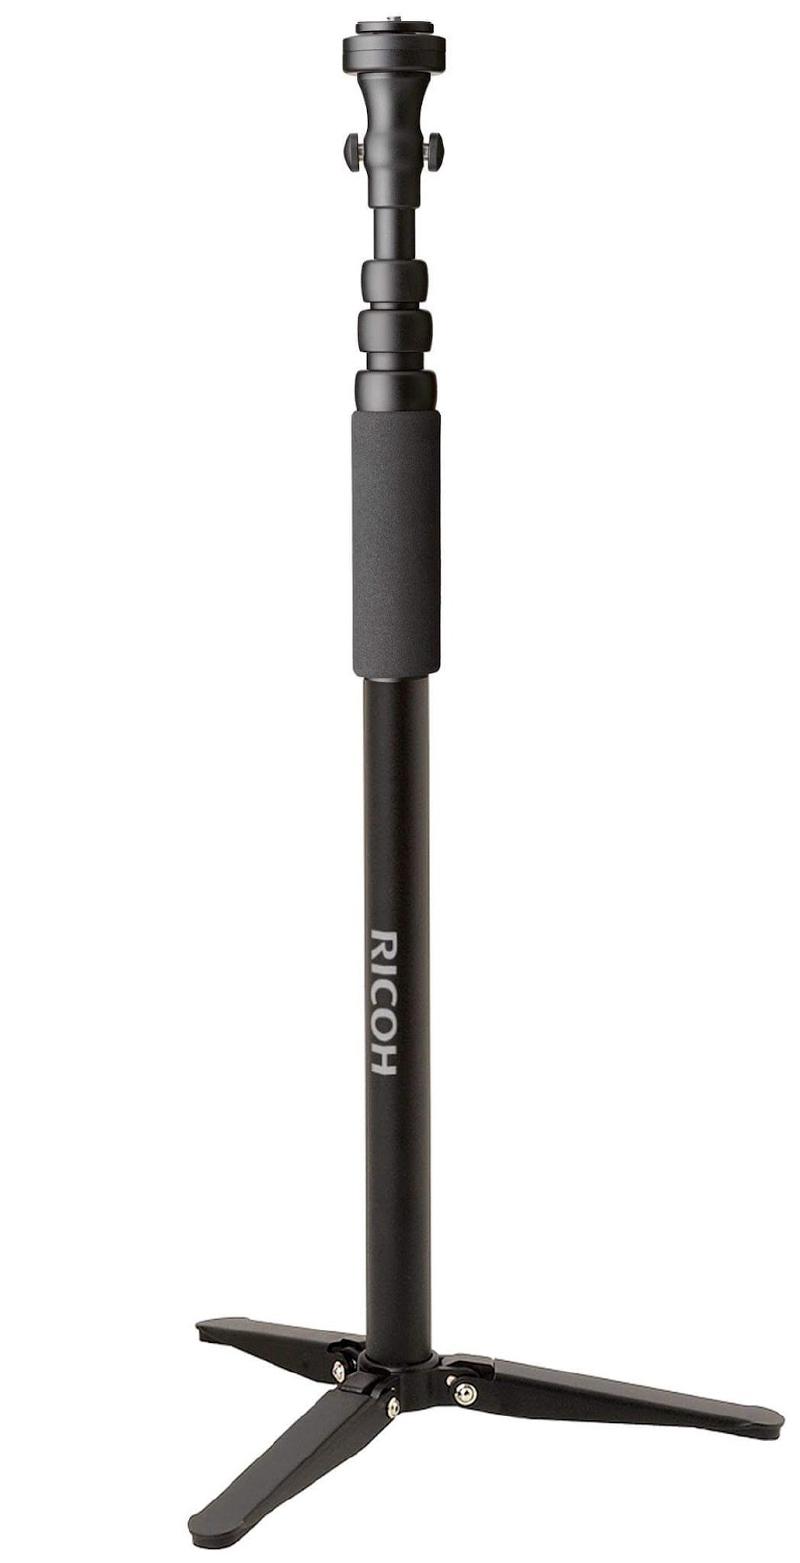
The Ricoh TM-3 is a very discreet selfie stick that has small lugs to help prevent a Theta from twisting (with modest success). It does a very good job of staying outside the frame, is lightweight and takes little place in your kit, unlike the equivalent from DJI. It has a standard 1/4"-20 socket on the handle to mount it onto a clamp or mini-tripod for added versatility. I never take the Z1 anywhere without one.

The Ricoh TM-1 (right) is a very cleverly designed tripod manufactured by SLIK. it has avery small tripod base and a telescoping pole with a button that allows it to be extended very quickly. There is a circular quick-release that screws into the camera’s tripod socket, with one spare. This makes for very quick deployment: pull on the telescoping tube to extend it, unfold the feed, stick the camera on the head’s quick release.

Ricoh also has a TM-2 with an articulating head, but then the stick becomes visible in the picture, which defeats the purpose. I’ve never been in a situation that warranted this joint.

Gimbal cameras

Gimbal cameras like the DJI Pocket or the Insta360 Luna Ultra are the spiritual successors of the camcorder. The fact the gimbal can orient in nearly every possible direction makes them like a panorama head and camera combined in one, and indeed, they all have a panorama feature, the Luna Ultra can take 200MP panoramas usin 24 stitched frames, albeit not full 360°. This resolution is much higher than that of the dual-fisheye cameras that can do around 30MP, but otherwise is no different from other stitched panoramas, including the risk of ghosting.

Printing

DNP DS-820A

Service Bureaus

Web publishing

Aframe

Marzipano

Facebook

Google Panoramio

VR Goggles

Exotica

Seitz Roundshot

Matterport
Managing /etc configuration in my homelab

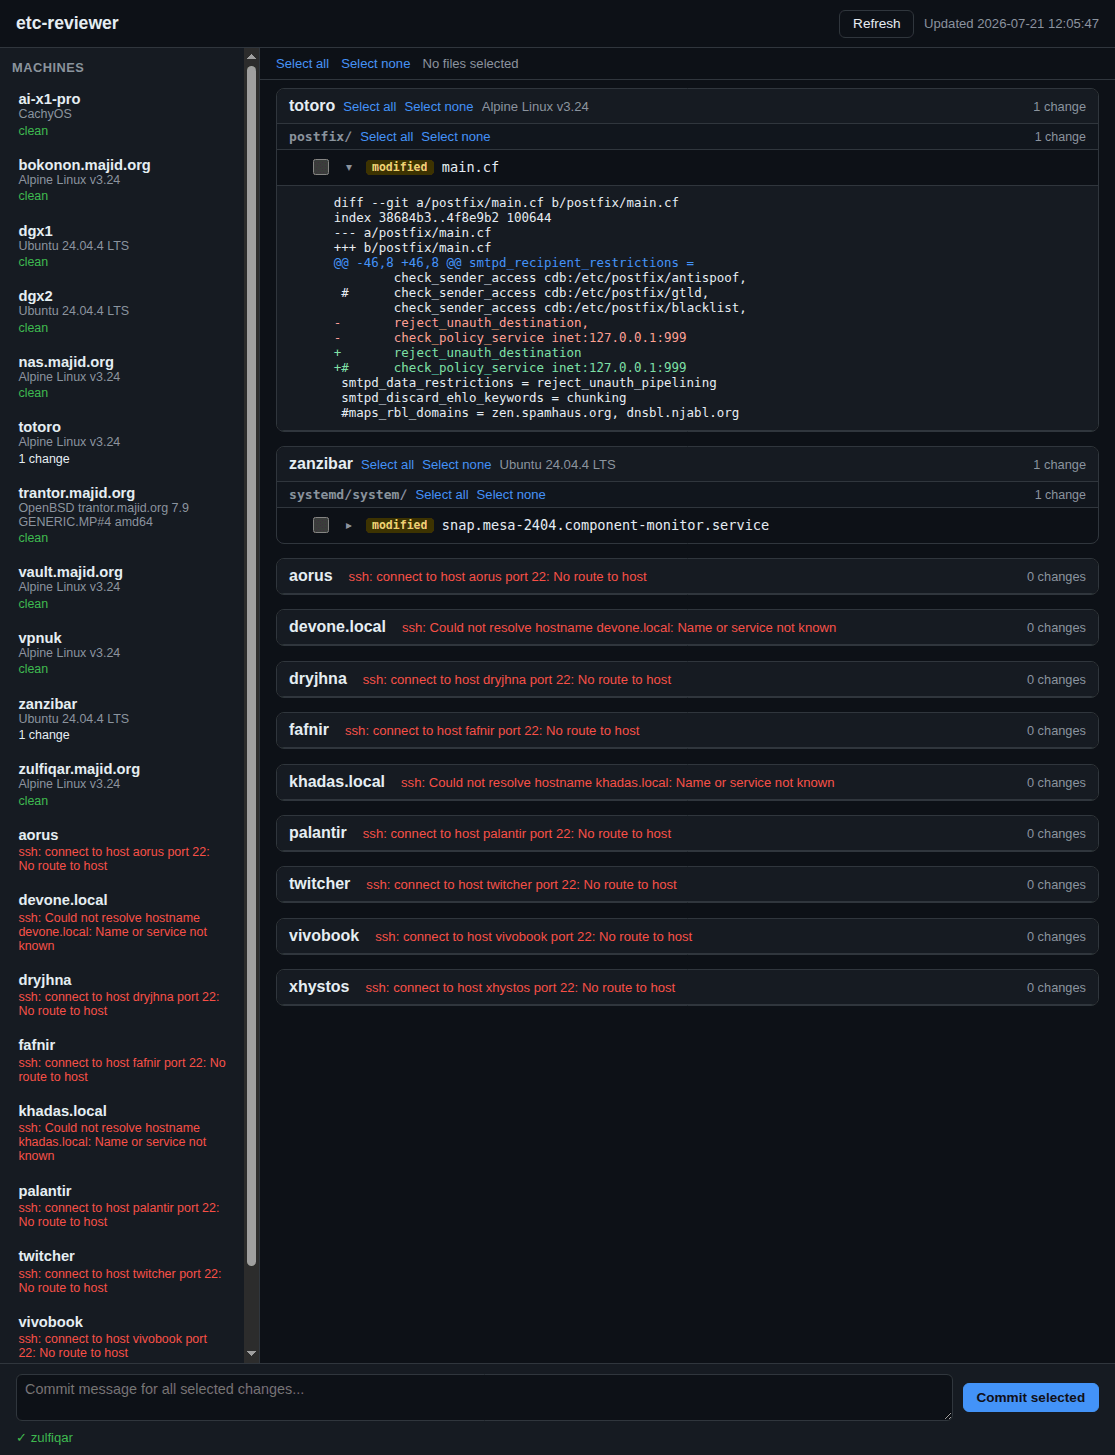
On the UNIX systems I manage as pets, not cattle I have a habit of using git init in /etc, checking in all files I want there, and adding to .gitignore transient files like those the obnoxious systemd insists on littering instead of placing in /var. I then have a check in Zabbix warning me of any uncommitted changes on the system. This makes experimenting very easy, has an audit trail of changes and generally makes life easier as a sysadmin.

Reviewing changes manually by ssh-ing into each system and issuing git commands gets old really fast, and I finally decided to do something about it, by having Claude vibe-code me a web UI to manage all the changes in a single pane of glass:

(the machines in red are laptops or servers that are only intermittently powered on)

There are systems like Ubuntu’s etc-keeper or conf-keep but they autocommit, I want every change to be intentionally reviewed by a human, i.e. myself.

It’s available in GitHub: https://github.com/fazalmajid/etc-reviewer

Tinkering with e-ink

For a long time I avoided e-ink devices. E Ink Corporation effectively holds a monopoly on eletrophoretic e-ink technology, and that has kept panel prices high. When combined with very slow refresh rates, e-ink devices are unitaskers like eBook readers, yet priced the same as versatile devices like tablets with much better display quality. Unlike some, I also find I prefer reading on LCD or OLED screens than e-ink. The sole saving grace of the technology is the display does not need to be powered on, which can lead to devices with outstanding battery life measured in weeks.

I have recently softened my stance and now own three e-ink devices:

  • PocketBook Verse e-reader. Unlike, say, a Kindle, it is not locked in to a content provide, and has a microSD card reader for expansion (I have 180GB of eBooks, more than most e-readers can handle), and it is fairly inexpensive (I paid £105 for mine).
  • A M5Stack Paper S3. There is currently a fad for the Xteink X4, but this device is superior: it’s open to custom firmware without having to pay a premium for a Developer Edition (I installed a community build of CrossPoint Reader, but TRMNL is available) and has a touchscreen.
  • A Seeed Studio reTerminal E1002. This has a 7.3" Spectra 6 display that can display in six colors (black, white, red, yellow, blue and green), has a batter life measured in weeks because it only wakes up every half hour or so to fetch updates and sleeps in a very low-power state in-between

The e-readers are fairly nondescript. I wanted to see why people rave about the benefits of e-ink for reading, and am not convinced, I still find reading on a phone or iPad or Google Pixel Tab (with GrapheneOS, of course) a much more pleasant reading experience.

The E1002 is a more interesting device. I’ve wanted for a while to have a dashboard at the entrance with weather and transit data so I can avoid specific Tube lines if they are out of service. There isn’t any conveniently located plug nearby so using an old tablet is not an option. I learned a few months ago about TRMNL, who make devices that would fit the bill, but the E1002 has the advantage of a color, not monochrome display, so I sprung the £100 or so for it on AliExpress.

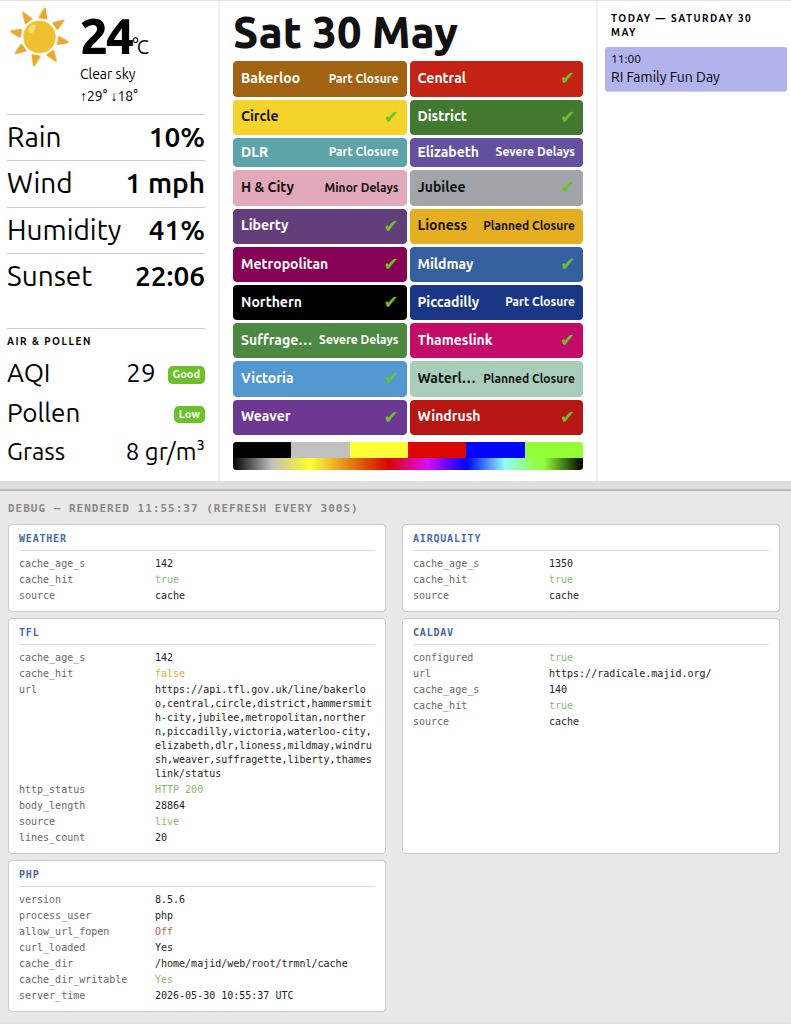
Seeed Studio offer a low-code environment called SenseCraft HMI, but it is too simplistic for my needs, and more importantly, it is cloud-dependent, which is simply not acceptable. The E1002 ships with reTerminal firmware tied to SenseCraft HMI, but they also offer a TRMNL-compatible firmware. TRMNL is also cloud-based, and they want you to pay a one-time $50 fee for the privilege of using a non-TRMNL device, but they do support running a custom server instead, so I vibe-coded one gTRMNL, that basically fetches a web page, renders it using an embedded Chromium browser and dithers it onto the 6 colors of the display using the Floyd-Steinberg algorithm. I also vibe-coded a simple dashboard in PHP to display the basic data I am interested in:

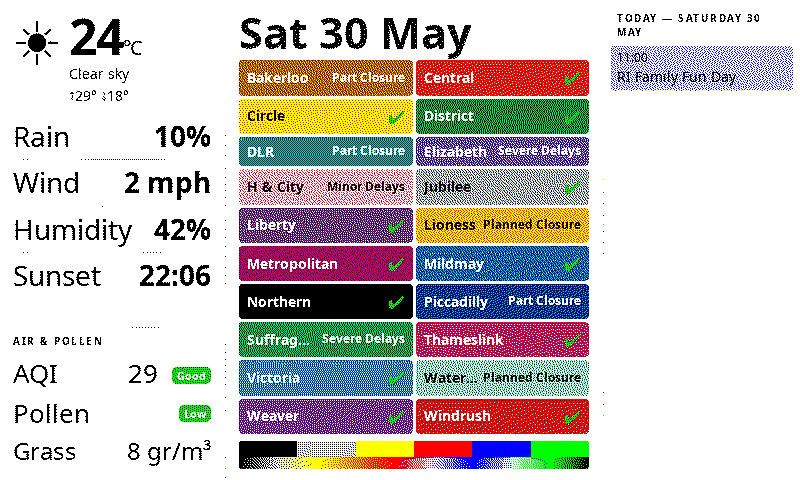
and after dithering it would look like this:

Unfortunately, when I reflashed with the Seeed TRMNL firmware 1.6.7, I was not getting all the colors. Green was turned to blue, blue was turned to black, yellow was turned to red. I tried installing TRMNL upstream firmware 1.7.7, and go similar results, except this time blue was turned into white, and green into yellow. I found a GitHub issue describing the problem, but no solution.

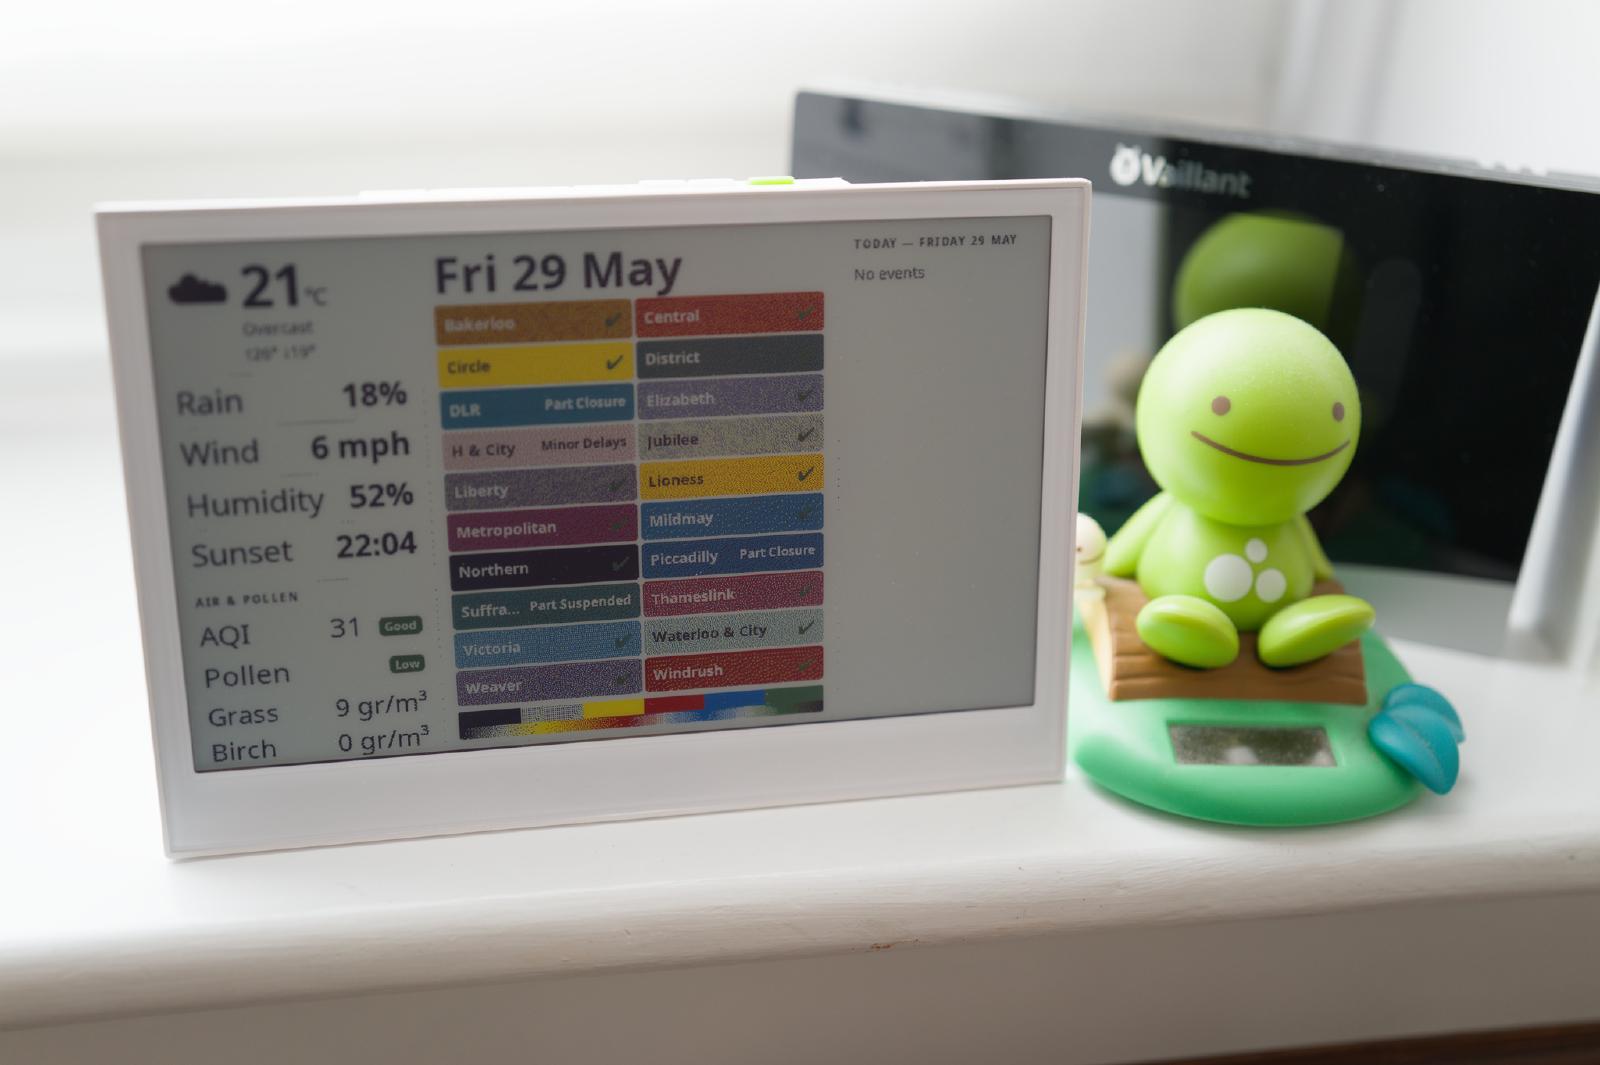
Long story short, I spent the afternoon identifying the root cause of the problem, which was that Seeed Studio had started implementing support for the E1002 in the TRMNL firmware, but hadn’t gotten around to implementing 6 colors support and were using only 4 colors as TRMNL does have a device with a 4-color screen. With assistance from Claude, I spent the afternoon implementing a fix and now it works perfectly:

The dithering makes for fuzzy text, and at some point in my copious spare time I will write a dedicated dashboard that generates the PNG directly without using a browser so I can control the colors and dithering, but it’s perfectly usable for now.

Fragmentation comes for Software

Until the 1970s, there were only four TV networks in the US. Then cable led to an explosion, from 28 in 1980, 79 in 1990 to well over a thousand today. Part of this was cheaper distribution via cable, but also because technology like computer video editing reduced the cost of production.

The flip side of this explosion was a fragmentation of audiences. The big four networks went from having 20-30% of the population and 80-90% of prime-time TV viewership to 20-30% prime time audience and low single digits of the population. This had all sorts of consequences, including politically as there is no longer a widely shared frame of reference, or someone like Walter Cronkite to tell Nixon the Vietnam War was over and lost.

The same fragmentation is coming for software via LLMs, for the same structural reasons. The SaaSpocalypse is overblown, because writing code is only a small part of the cost of producing software, developing requirements, integration, testing and maintenance are far larger components. Thus the dream of DIY enterprise software will remain that, a dream. Software will remain the preserve of companies that can manage the development process, but the dropping cost of coding will increase the number of software houses, and their addressable market will shrink, as it did for the big four TV networks. This will have an impact on the economics, as the cost of development and marketing, even if lowered by LLMs, will also be spread over a smaller customer base.

GL.iNet Comet 5G Review

One of the downsides of self-hosting critical applications like email on your homelab is that if you lose connectivity, especially when you are travelling, you are out of luck. It’s happened to me twice. The first time I had to ask a colleague (Hi Jason!) to go get my spare keys from the building super and reboot my home server. In the other instance, I walked my wife over the phone through the steps of rebooting our OpenBSD home router that runs on a somewhat dubious computer sourced from AliExpress with an Intel N100. I actually ordered an industrial-grade Asus NUC 13 Rugged N50 to replace it, but in a variant of the Heisenberg effect, the original machine started working flawlessly, go figure.

On some of my HP machines (Z workstations and EliteDesk 8xx Mini), the firmware includes Intel AMT/IME spyware management firmware. You can install the MeshCommander software to get a poor man’s version of the IPMI remote management facility included in most servers. IPMI usually includes remote KVM, i.e. being able to control the computer over the network as if you were directly in front of its keyboard, mouse and monitor. KVM stands for Keyboard, Video and Mouse, although most KVM systems also give you the ability to insert a virtual USB drive to boot into diagnostics or a rescue drive. This allows access to the BIOS and other things you can’t do from the OS itself, or recover if the OS itself has crashed.

To resolve this vulnerability, I have been equipping the majority of my key machines that don’t have Intel AMT with physical IP KVM devices. These used to be very expensive and required having some cursed version of the Java plugin installed in your browser, but recently the Pi-KVM project has opened up the market and there are now a host of relatively inexpensive (in the $100 range) devices available like the JetKVM and GL.iNet’s Comet line of IP KVMs.

GL.iNet is known for its well-regarded line of travel routers like the tiny but mighty Mango, but has been expanding into IoT and now IP KVMs. That line is now quite extensive, with:

  • The basic Comet GL-RM1.
  • A variant with PoE, the GL-RM1PE which also supports USB-C PD for power.
  • A pro variant, the GL-RM10 (I haven’t tried it).
  • More interestingly, a 5G cellular equipped model, the GL-RM10C.

Like their travel routers, the KVMs have an open operating system based on Linux with SSH and root access, and excellent support for VPN protocols actually invented in this millennium, i.e. WireGuard rather than hoary L2TP, PPTP, IKE/IPsec or OpenVPN.

I have a basic Comet, two PoE powered ones and the 5G cellular one attached to the router.

Due to the exhaustion of available IPv4 address pools, almost all cellular carriers today use some form of Carrier-grade NAT (CGNAT), which means you do not have a permanent IP address for your mobile device. Some cellular carriers will offer plans with static IP addresses, but they are extremely expensive including the per-kilobyte charges because this is a niche market, primarily enterprises wanting remote monitoring and access to satellite offices.

GL.iNet offers a cloud service for remote access and also supports Tailscale and ZeroTier. Either of these would obviate the need for an exotic data plan SIM. I don’t trust the cloud, however, and find Tailscale too invasive, so I opted instead to set up WireGuard between the GL-RM10C and a cloud server, with routes forcing it to use the 5G wwan0 interface instead of Ethernet for the tunnel.

The /etc/wireguard/wg0.conf config on the server is:

[Interface]
Address = 192.168.2.1/24, fddd::ffff/64
ListenPort = 51820
PrivateKey = <redacted>
PostUp = iptables -A FORWARD -i %i -j ACCEPT; iptables -t nat -A POSTROUTING -o eth0 -j MASQUERADE;iptables -A FORWARD -o %i -j ACCEPT; ip6tables -A FORWARD -i %i -j ACCEPT; ip6tables -t nat -A POSTROUTING -o eth0 -j MASQUERADE;ip6tables -A FORWARD -o %i -j ACCEPT
PostDown = iptables -D FORWARD -i %i -j ACCEPT; iptables -t nat -D POSTROUTING -o eth0 -j MASQUERADE;iptables -D FORWARD -o %i -j ACCEPT; ip6tables -D FORWARD -i %i -j ACCEPT; ip6tables -t nat -D POSTROUTING -o eth0 -j MASQUERADE;ip6tables -D FORWARD -o %i -j ACCEPT
 
[Peer]
PublicKey = <redacted>
AllowedIPs = 192.168.2.2/32, fddd::1/128

on the GL-KVM, it is:

[Interface]
Address = 192.168.2.2/24, fddd::1/64
#ListenPort = 51820
PrivateKey = <redacted>
 
[Peer]
PublicKey = <redacted>
AllowedIPs = 192.168.2.0/24
Endpoint = <redacted>:51820
PersistentKeepalive = 30

Add opening UDP port 51820 on the firewall, and on the KVM a /etc/init.d startup script to call route add <ip of server> wwan0 and wg-quick up wg0 at boot time, that establishes the tunnel. Since the IPs on either end are not routable, I also have HAProxy running in TCP mode on the server to allow access from the Internet:

global
    log /dev/log local0
    log /dev/log local1 notice
    daemon
    user nobody
    group nobody

defaults
    mode tcp
    log global
    option tcplog
    timeout connect 5s
    timeout client  1m
    timeout server  1m

frontend https_in
    bind <redacted>:443
    default_backend wg_https_out

backend wg_https_out
    mode tcp
    server wg0_peer 192.168.2.2:443 check

I have a £5/month SIM card and plan installed, with a 5GB quota. I only start HAProxy when I actually need it so I don’t waste any of it on script kiddies trying to break in.

Finally, the GLKVM OS seems to overwrite WireGuard configs and /etc/init.d (but fortunately not the /root/.ssh/authorized_keys) so to bring up WG on the GLKVM, I run this script out of an hourly crontab:

#!/bin/sh
PATH=/usr/local/bin:${PATH}:/usr/sbin
LD_LIBRARY_PATH=${LD_LIBRARY_PATH}:/usr/local/lib:/usr/local/postgresql/lib
export PATH
export LD_LIBRARY_PATH

set -e

cd $HOME

printf '\033[1;32m%s\033[0m\n' 'Recreating wg0.conf'
ssh root@glkvm "cat > /etc/wireguard/wg0.conf" <<EOF
[Interface]
Address = 192.168.2.2/24, fddd::1/64
#ListenPort = 51820
PrivateKey = <redacted, private key of the GLKVM>
 
[Peer]
PublicKey = <redacted, public key of the WG server>
AllowedIPs = 192.168.2.0/24
Endpoint = <redacted, public IP of the WG server>:51820
PersistentKeepalive = 30
EOF
ssh root@glkvm "chmod 600 /etc/wireguard/wg0.conf"

printf '\033[1;32m%s\033[0m\n' 'Waiting for wwan0 to come up'
iface=wwan0
ssh root@glkvm <<EOF
while :; do
    ip link show dev "$iface" >/dev/null 2>&1 || {
        sleep 1
        echo waiting for $iface to be plumbed
        continue
    }

    ip link show dev "$iface" 2>/dev/null | grep -q 'state UP' || {
        sleep 1
        echo waiting for $iface to come up
        continue
    }

    break
done
EOF

printf '\033[1;32m%s\033[0m\n' 'Routes'
ssh root@glkvm "route -n"
printf '\033[1;32m%s\033[0m\n' 'Adding cellular route to vpnuk'
ssh root@glkvm "route add <redacted, public IP of the WG server> wwan0" || true
ssh root@glkvm "route -n|grep wwan0"
printf '\033[1;32m%s\033[0m\n' 'Starting wg'
ssh root@glkvm "wg-quick up wg0" || true
sleep 2
printf '\033[1;32m%s\033[0m\n' 'wg status'
ssh root@glkvm "wg"

The user interface is largely the same across the entire GL.iNet KVM product line, is excellent, uses native Web technologies and WebRTC to provide the remote video, so no janky VNC plugins or Java required. The video is crisp, as can be expected from a purely digital signal path, and I haven’t noticed compression artifacts, even when running over cellular.

It does have the same problem as almost all IoT devices with a Web UI, of not being able to self-provision a TLS certificate. I modified my monthly Let’s Encrypt certificate rotation script to copy the keys and certificates to /etc/kvmd/user/ssl/server.{key,crt} where the firmware expects them to be. There is an IETF effort to fix this once and for all, but it is still very much work-in-progress and probably still too complex for the average consumer to deal with.

It’s also worth noting the 5G in the Comet 5G is RedCap (reduced capability), which is a cheaper and more power-efficient version of 5G that is capped at around 100Mbps instead of the gigabit speeds full-fat 5G offers. This is unlikely to be an issue for this class of devices, as people are not buying them to play Doom remotely.

What you don’t get with the Comets is the ability to remotely power-cycle the machine you get with IPMI or AMT. They have an accessory for computers with ATX motherboards, but I haven’t had one in ages, and a Rube Goldberg-like contraption poetically named Fingerbot that physically pushes the power button. JetKVM does have an accessory that interposes between computers with a barrel DC connector and their power brick, to allow turning them on and off. Let’s hope GL.iNet is inspired to make their own, and also a USB-C one while they are at it. In the meantime, I plan on using a smart-home type Wi-Fi-controlled power switch running Tasmota to do forced power cycles.

I also have a JetKVM. It’s a cute little device, very compact (but surprisingly heavy), and I am planning to add it to my portable computer-maintenance toolkit rather than keeping it stationary like my Comets.